On the platform, participants can follow courses that have been put together with care by us. The courses often consist of learning sets, which have been created based on corresponding qualification files. Our learning sets are kept up-to-date every school year.
As a coach, you may want to adjust a learning set, for example to make it more specific for a certain field or region, or because you have some great personal assignments you would like to add. In this case, it's possible to personalize a learning set. In this article we explain how.
1. Creating your own learning set
When you are going to customize a course, a copy of the existing learning set will be made. In this copy you can make the adjustments you wish to make. Participants can later select your exercise set to follow the modified course.
Note! As the publisher, we have put the existing learning sets together with care. The sets fully cover any qualification files and prepare the participant fully for an exam. If you decide to to create your own exercise set and adjust the assignments, we as the publisher can no longer guarantee the quality of educational material!
Customizing a course goes as follows:
- Select the course you would like to personalize. Click on the tile of the course and select 'assignments'.

- You will now see all the available learning sets (for example: School year 2021-2022) Select the one you would like to duplicate and edit underneath the title of the course.
- Click the 3 dots below each other at the top right of the assignments.
- Click 'Copy and edit learning set' to create a new learning set with its own title.
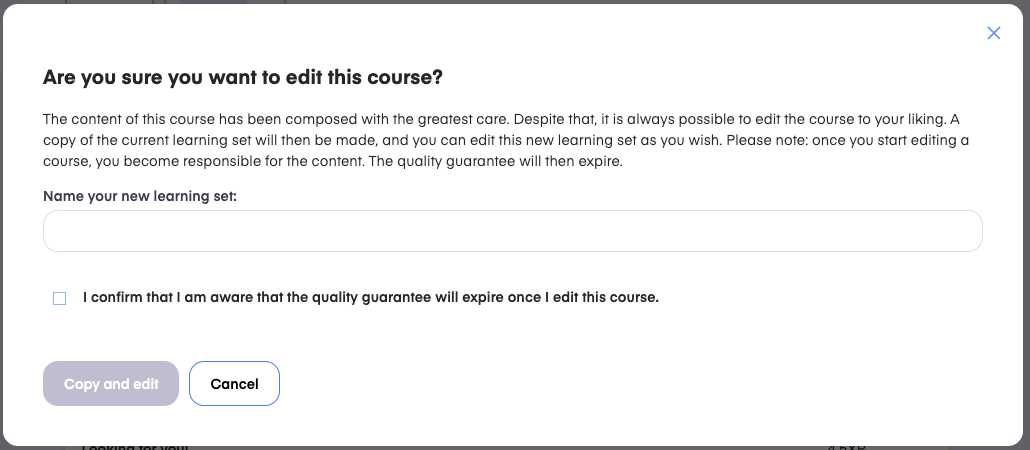
- You will see a pop-up in which you can enter the name of your set, and read about the quality guarantee of the publisher expiring. Enter a name and check the box. Then click 'Copy and edit'. Note! You can no longer change the title afterwards.
- A copy of the selected learning set has now been made, and you can start editing.
2.Customizing your own learning set
Once you have made a copy of a learning set, you will now see it listed among all available learning sets. Once again click on the 3 dots at the top right of the assignments and choose 'Edit content'. You will see all assignments from the copied learning set listed below each other. On the right side of every title you will see the option to edit the existing assignment. If you scroll further down, you can also add your own, completely new items and chapters. In this step we explain all of the basic edits you can make.
2.1 Adding a new chapter
Do you want to change the entire grouping of the assignments and possibly add completely new assignments? Then it could be useful to start by adding a new chapter. Scroll down to below the existing assignments. Here you will notice the option 'Add chapter'. When you click on it, a pop-up will appear in which you can add a title, introduction, summary and thumbnail. Click on 'Create chapter' once everything is completed to your liking. 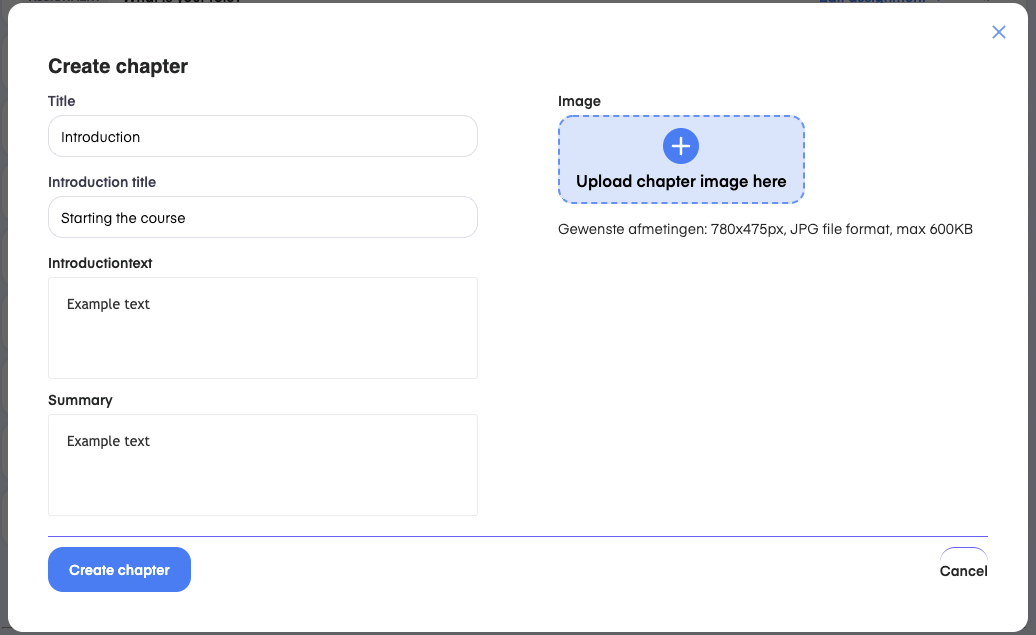
Did you succeed in adding the new chapter? Then you can now add assignments to it by dragging them underneath the chapter's title. To drag, click on the 6 vertical dots on the right side of the assignment bar.
2.2 Adding a new item
Would you like to add a completely new item, for example an assignment? You can do this by clicking 'Add item' underneath the existing assignments in a chapter. First, you can choose whether you would like to add an assignment, theory or a subject. An assignment card consists of an introduction, and often several parts in which a participant follows certain steps to finally submit a file. A theory card often consists of text that the participant must read, concluded with multiple choice questions or drag and drop exercises to test their knowledge. A subject is a kind of category that is included within a chapter. The subject should in its turn include certain assignments. Imagine if there were a chapter on Spanish cuisine, 'tapas' for example could be a subject.
If you choose the assignment option, you will be presented with a pop-up menu as shown below.
When you choose this option, you can add a title, the amount of people it takes to complete the assignment, and the possibility to choose a thumbnail. This is the image that will be shown on the left side of the assignment, above the introductory text. Finally, you can check certain properties:
- Desktop required: when the participant will need a computer to complete the assignment, you can check this option.
- Final assignment: when you would like to test participants with an assignment interim, you can check this option.
- Suitable for remote learning: when the participant can complete this assignment at home, you can check this option.
- Meetup assignment: does the assignment you would like to add require a (classroom) meeting? If so, check this option.
- Assignment at the workplace: Is the assignment you would like to add to be completed in another place than at school or at home? For example during an internship? Then you can check this option.
- Checkpoint assignment: Is particular assignment extra important, or do you want the participant to complete it to meet certain conditions for example? Then you can check this option.
For the option theory you will see the possibilities of adding a title and adding a thumbnail. The same applies to the option subject, although here you can also fill in an introductory text.
2.3 Editing an existing assignment
Do you want to edit an existing assignment? In that case you can click on 'edit assignment' right next to the title. You will see a page that shows the assignment as a participant would see it. Here you can make some changes. In part 3 of this article we explain what changes you can make.
3. Possible functionalities
Have you succeeded in customizing your learning set? Then it's time to start editing! We will explain which functionalities you can apply here.
3.1 Displaying card types
Are you going to edit an assignment card? If so, you will see the following screen in edit mode. For the sake of convenience, we have used an existing assignment card as an example. When you add a new item, you can build it from the base yourself. For the possibilities, read '3.3 Adding content blocks'.

Are you editing a theory card? Then you will see a screen similar to the one below. For the sake of convenience, we have used an existing assignment card as an example. When you add a new item, you can build it from the base yourself. For the possibilities, read '3.3 Adding content blocks'.
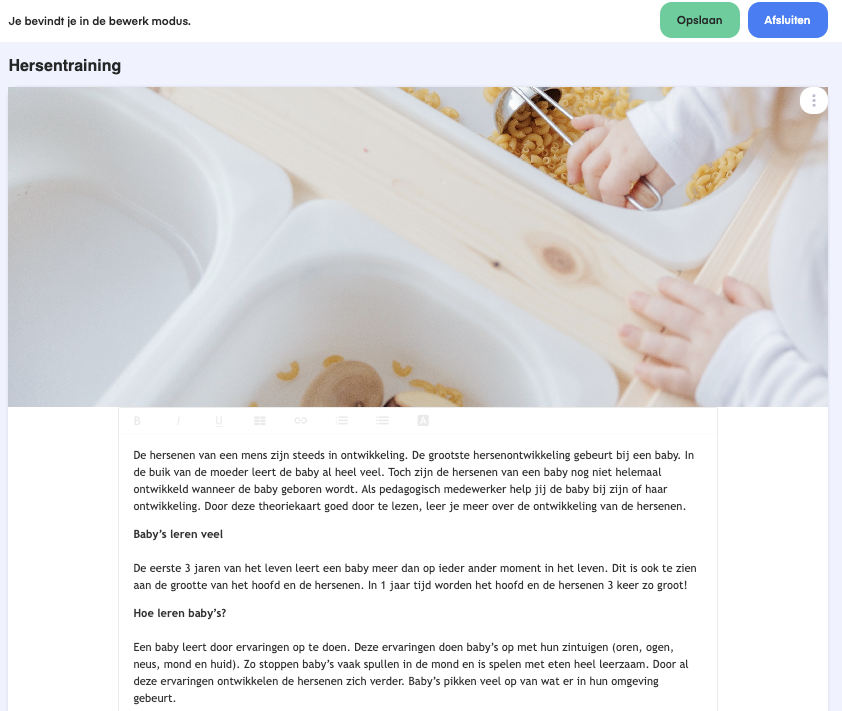
As you can see, the images above are already very similar to how an assignment card or theory card would be displayed in the participant's environment. This way, it will give you an idea of the way the participant will see it. You can now start editing the texts by clicking in them and typing. You can also format the text as you wish.
3.3 Adding content blocks
It's also possible to add content blocks while editing. You can do this in an existing content block, or you can add a completely new content block. You can start editing by clicking the blue plus signs. Once you do this, you will see the screen below in which you can select the functionality you would like to use.
- Callout: using this functionality, you can add a warning to an assignment, something a participant needs to pay some extra attention to. You can choose the symbol you would like to indicate the callout and add a text.
- Accordion: are you adding a long piece of text to an assignment? A case to practice with for example? Then you can make good use of this functionality. It allows the participant to fold a piece of text in and out.
- Paragraph: when you would like to add a(n extra) piece of text, you can choose to adda new paragraph.
- Slider: You add a slider in case an assignment card needs to consist out of multiple parts. This is the type of content block in which you can click a 'next' button.
- List: does the assignment require the participant to create a list or enumeration? Then the list functionality may be useful to add.
- Title
- Image
- Drag and Drop question: this functionality allows a participant to make combinations of certain terms and definitions for example, by dragging them.
- Drag to Sort question: a drag to sort question allows the participant to drag certain terms into the right order.
- File upload: in case the participant needs to upload a file which has been created using another program, for example Word, it's important to add 'file upload' button at the end of the assignment.
- Multiple choice question: if you add a multiple choice question, the participant can select only one right answer.
- Selection question: if you add a selection question, the participant can select multiple right answers.
- Open question: when adding an open question, you will have the option to fill in a fixed answer or certain words that should occur in the given answer. This is not mandatory.
- Open question (multiple lines): the same as an open question, but with the possibility to give a more detailed answer.
- Video
- Cards widget: the cards widget can be used in case the participant needs to make a list of different sections for an assignment.
3.4 More settings
To change the general settings of an assignment, you can click on 'More settings' above the assignment.
When you click on 'Details' you can change the same settings you have entered when creating the assignment (see 2.2). These include the title of the assignment and the number of people needed to complete te assignment. When you click 'Qualifications' you can check which work processes and knowledge and skills from the corresponding qualification file belong to this assignment. Note! These might be in Dutch. Underneath the heading 'Support' you can add tips for the participant that help them complete the assignment, and notes for the teacher. Finally, you can enter the number of XP and change the display.
Have you finished editing the assignment? Then click 'Save' and 'Close' to go back to the overview of all assignments.
3. Activating and deactivating learning sets
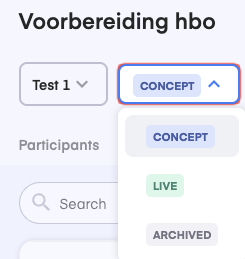
Is your learning set completely finished and ready for use? Then you can publish it. A learning set will by default be on the 'concept' status. When you select the set in the course you have created it in and click on 'concept' you will also see the options 'live' and 'archived'. Choose 'live' to to make the learning set visible for your participants. From that moment on, they can see the learning set as well and enroll. Choose 'archived' when you want to stop any new enrollments to the learning set. New participants won't see the learning set any langer if you do so, but for participants that have already enrolled it will remain available.
Frequently asked questions:
- Can a student switch between learning sets?
Technically it is possible, but we would advise against it. When a student switches between learning sets, all progress will be lost. This is due to the fact that assignments can differ in the different sets. - Can I also share my created learning sets with colleagues?Kan ik eigen opdrachtensets ook delen met collega's?
Unfortunately you can't do this yourself, but our support team can arrange this for you. You can contact them via [email protected] or [email protected].